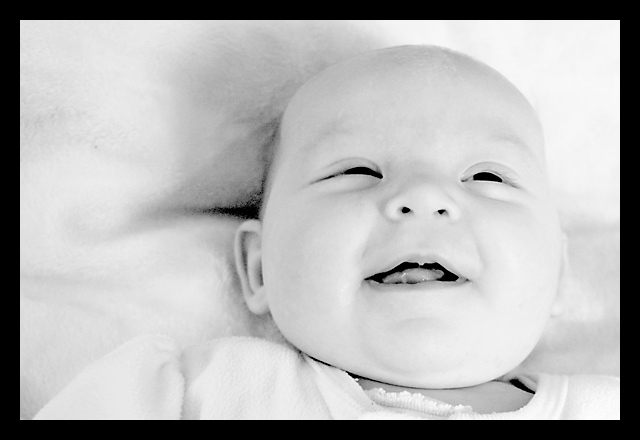
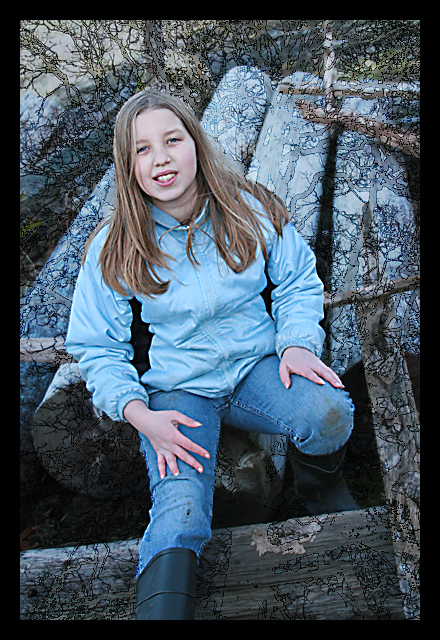
Here are two photos I just Photoshopped.
With this first photo, I found that I could use the black and white conversion technique I share below. Except instead of selecting the inverse selection - I use the first selection. Step 6 in the previous blog entry. Then when I add a solid color to the photo I choose a light color (usually white) instead of black. This gives the softer more blown out look common in baby portraits. I liked the effect on this photo.
With the second photo I was playing with textures. I had a tree image I used as a texture. I duplicated the background file of the main image. Then, I added the tree as a second layer. Then I chose blending options (after right clicking on the tree layer), and under General Blending, I chose Overlay and played with the opacity till I liked the effect. Then I took the background layer and moved it on top of the overlay (texture file). (I selected layer from background and moved it to be the top layer.) Then I Alt-Layer Masked (circle with square in it). I chose I white paint brush and painted over the subject of the photo so that the texture didn't apply to her. I merged the file and saved.
No comments:
Post a Comment