Playing Around

I've been playing around with Photoshop tonight. Mostly, I've been playing around with this tutorial:

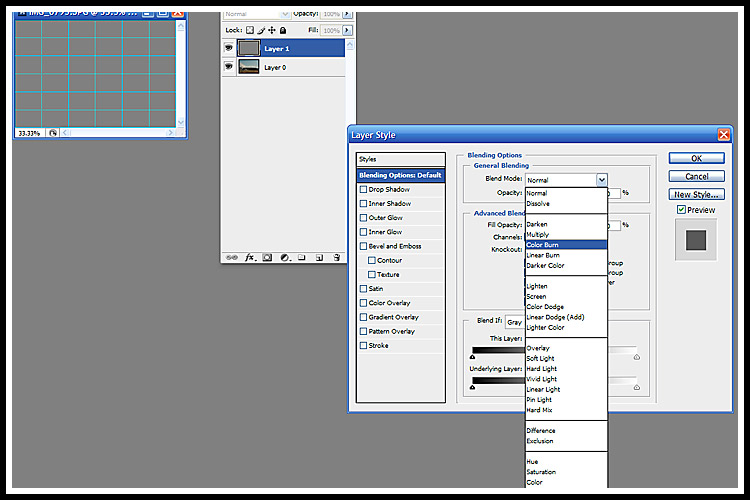
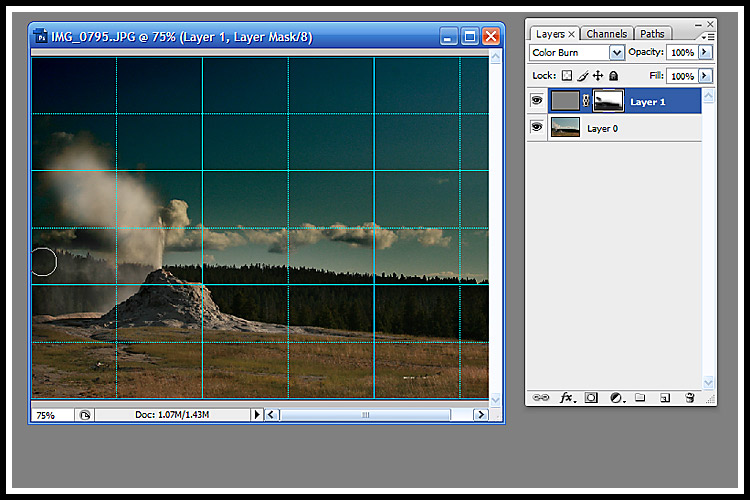
http://pshero.com/photoshop-tutorials/photo-effects/calculations-and-colorization

The tutorial is all about converting to black and white using Image > Calculations, and then adding a gradient to the black and white image.

The Calculations method of converting to black and white is really dramatic and super easy. There are so many interesting methods of converting to black and white. One of my other favorites, I write about here:

http://createdforinspiration.blogspot.com/2009/03/black-white-baby-portrait.html

But, this method seems simpler to me and gives you a different result.

Of course, you can also simply:

Image > Adjustments > Desaturate.

Or,

Image > Mode > Grayscale.

Or,

Create An Adjustment Layer (Round Black/White circle at the bottom of your layers pallette) and choose Black & White from the pull down menu, and play with the sliders.

Or,

Create An Adjustment Layer and choose Channel Mixer. Then, click the Monochrome box in the Channel Mixer and play with the sliders.

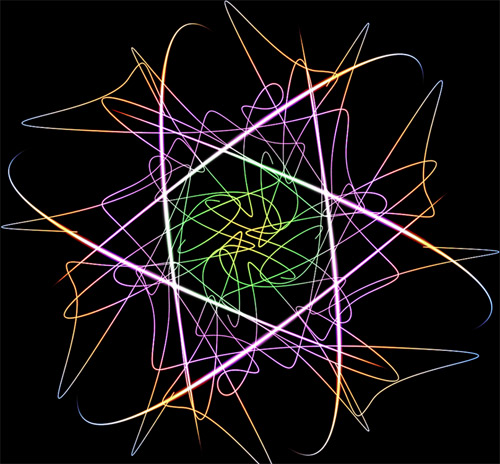
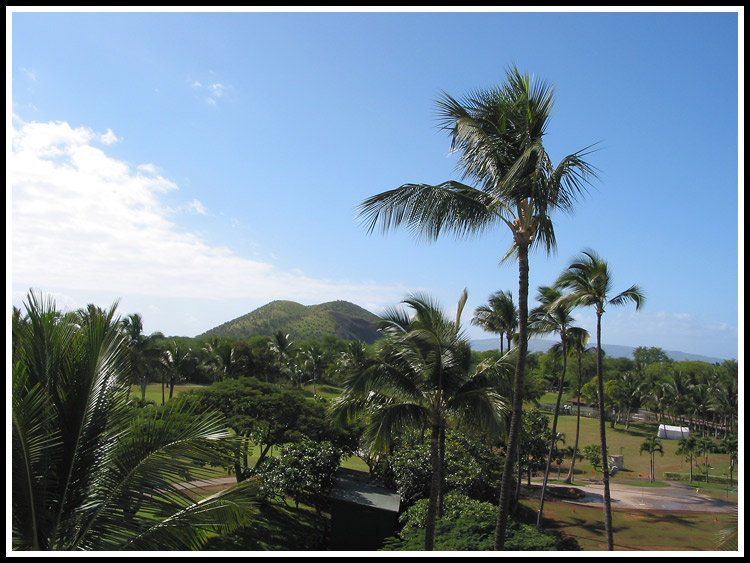
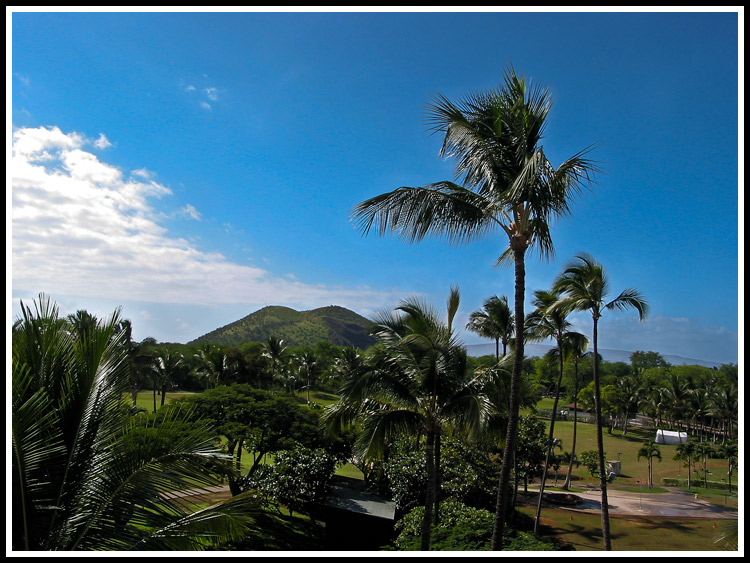
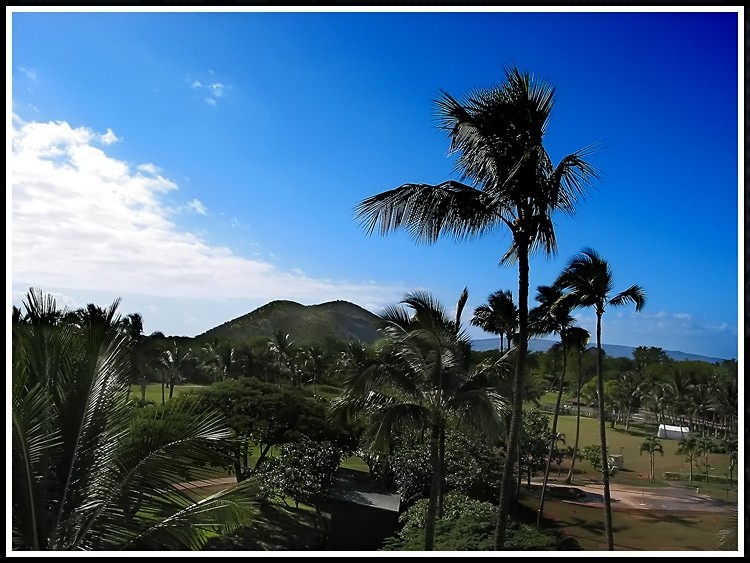
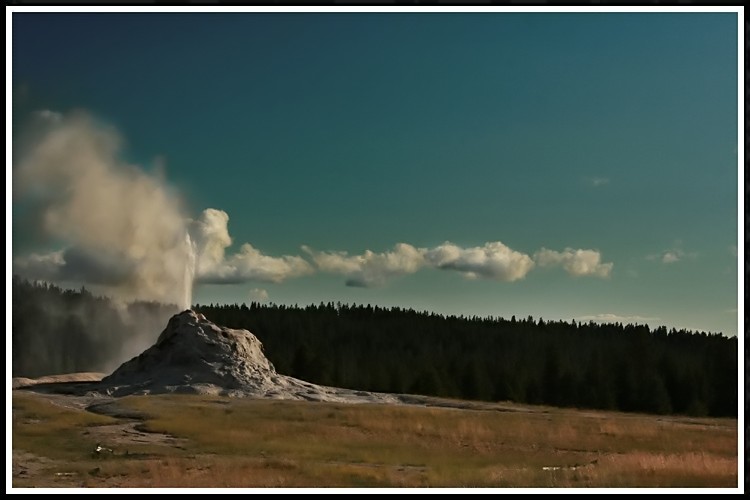
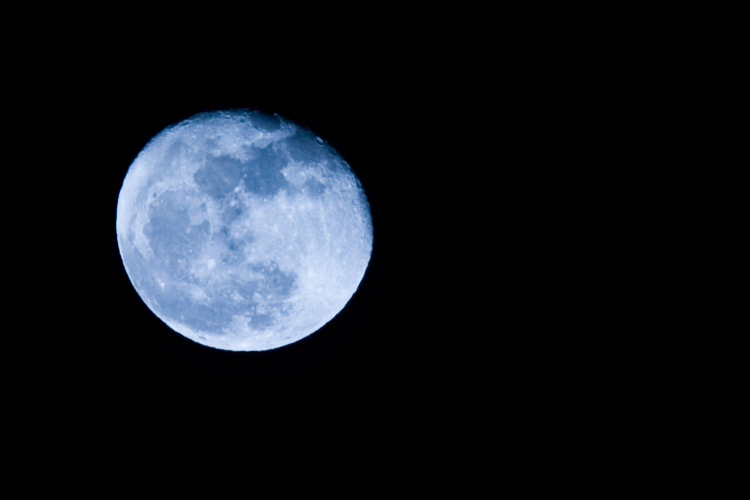
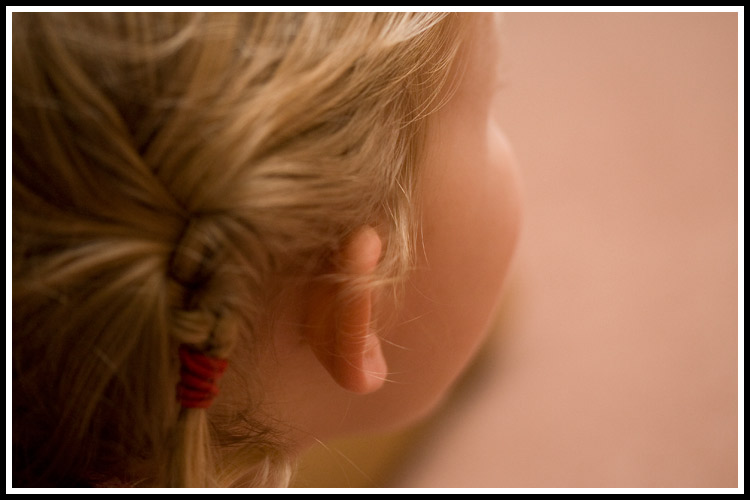
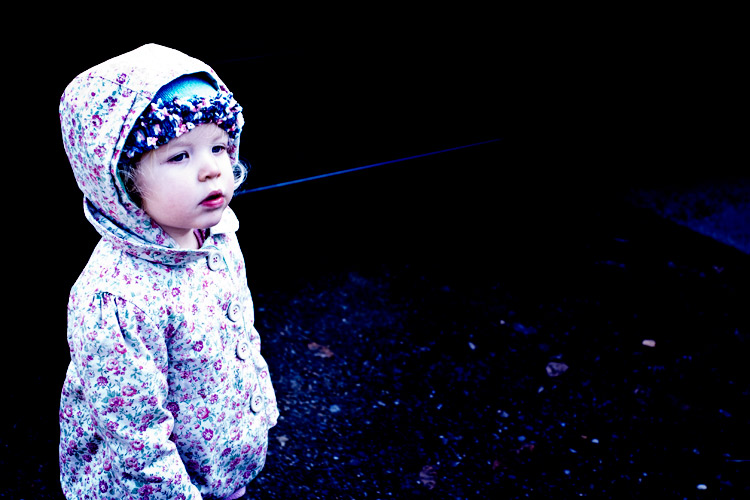
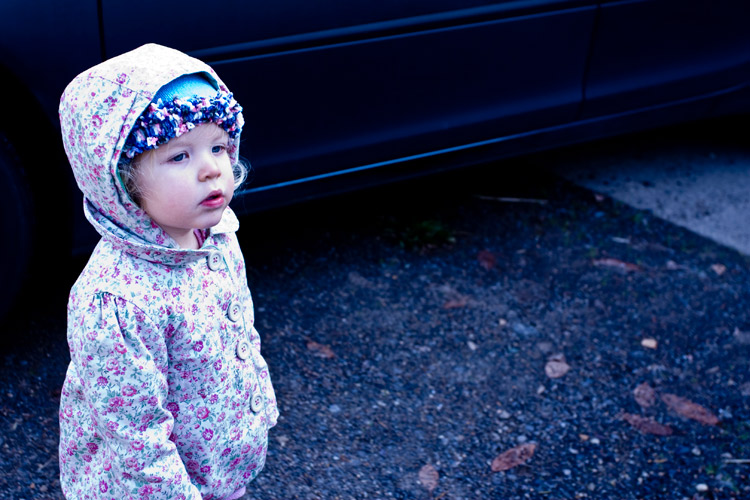
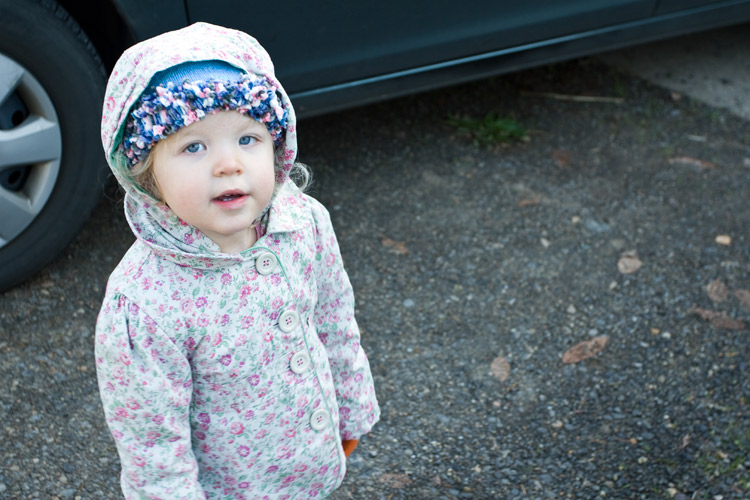
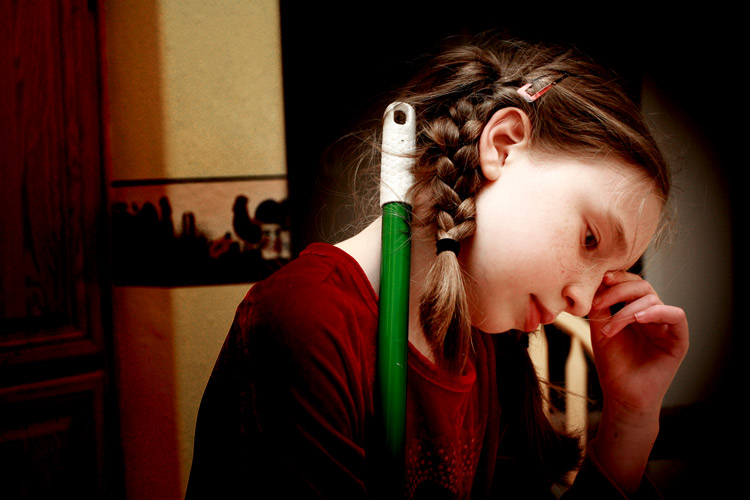
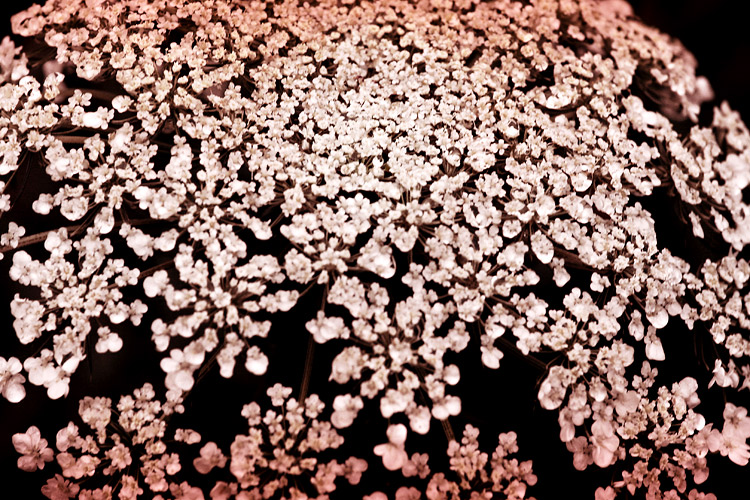
Here are some images I made tonight with the Calculations and Colorization tutorial listed above. I used the exact tutorial on my flower pictures. Then, I used the high contrast black and white conversion using Calculations to adjust some photos that never quite showed the full range of colors or contrast that I saw with my eyes, using different blending techniques (soft light and overlay and different combinations of opacity for various layers).

calculations_gradient_red_lace

calculations_gradient_green_lace

calculations_olympics

yellowstone_blue_stream

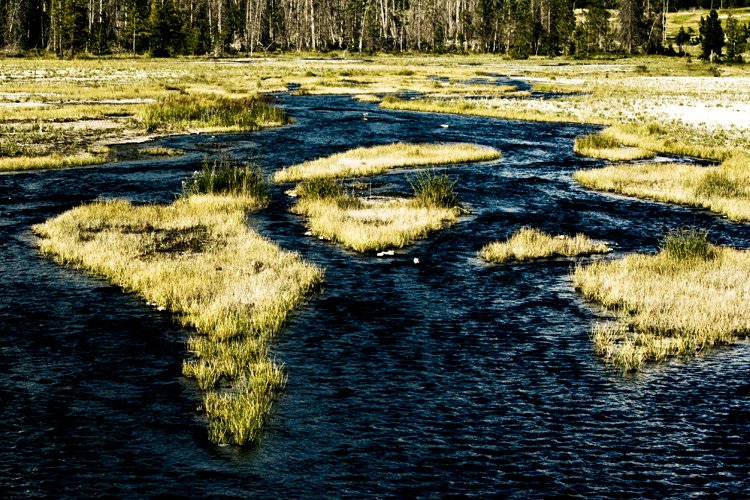
Even enhanced here in Photoshop, this photo didn't do justice to the BLUE, BLUE stream I saw here at Yellowstone. Unfortuneately, we drove by it at noon day and then stopped by when the light was lower in the sky. The irradescent blue bacteria in the stream were really cool.

yellowstone_grand_prismatic

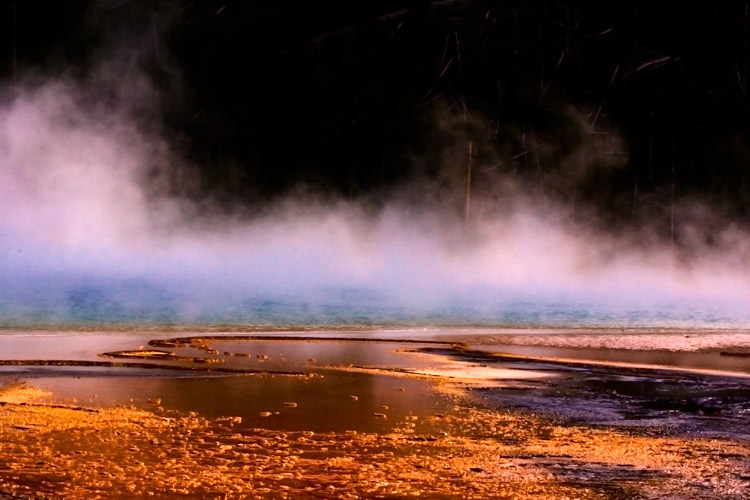
Truly, the Grand Prismatic pool at Yellowstone has all these colors and more. It's a sight to behold. Make sure, if you ever go to Yellowstone, to stop at this one.

Fix It Friday - Little Girl & Doll

It's Fix It Friday over at I Heart Faces. This picture with the girl and her doll is precious, and captures perfectly what being a little girl is about. I have two renditions for Fix It Friday: one with increased contrast, texture, and a text; the other in black and white.


Here's the original.

girl_and_doll_orig

Here's the color "Fix It".

girl_and_doll_fix_it

Here's the black and white.

girl_and_doll_bw

I Heart Faces - Angles

This week's theme at I Heart Faces is angles. So, I submit a photo I took at an interesting angle. This photo was taken just after a late spring rainstorm and jumping in puddles and being silly is a lot of fun after it rains. So, I got a lot of fun photos on this particular day.


fun_in_the_rain

Photoshop Shapes

I came across a Photoshop Shape Tutorial. Photoshop actually has quite rich shape features. They are a lot of fun to play with.

Here is the link:

http://www.showandtell-graphics.com/fun-with-shapes.php

Here are some images I made with the technique:

shapes_1

I Heart Faces - Bundled Up

I Heart Faces theme this week is "Bundled Up". This photograph popped right into my mind. It is one of my absolute favorites. I love the rich tones and the sweet moment in time when my littlest girl was all bundled up. Although we had no snow to speak of this year, I think this photo describes that theme perfectly.


bundled_up_750

Enhancing Skies

Thanks to Marla, I learned a second method for enhancing dull skies. Part Two of this tutorial: http://www.layersmagazine.com/exposure-blending-in-photoshop.html

This technique is also good for high contrast photos that have heavy shadows and heavy highlights. It brings out the details in the photos that are typically missing in deep shadows or bright highlights.

Basically, by opening your RAW image as a Smart Object, you are able to create a second version of your image which you can adjust with Camera Raw. Then you apply a adjustment filter to it, to hide portion where you want to use the original settings from your first Camera Raw version of the photo.

I compared this to the other technique I learned for enhancing skies...which is to add a second layer at 50% grey, apply color burn, and make an adjustment layer to get back your original image for the non-burned layer.

Just for fun, I played around with these two techniques to compare them. I took an old photo from Hawaii and applied the two techniques. Basically, the Camera Raw/Smart Object version seems to restore the actual details of the sky. The Color Burn version seems to be an artistic addition to your photo. It produces slightly unreal colors in the sky...but color popularly seen in digital photography today. Here are the versions...

hawaii_orig_jpeg

Original

hawaii_raw_save_as_smart_object

Camera Raw/Smart Object

hawaii_skies_enhanced

Color Burn (again this technique brought out the noise, so I ran the Noise Filter on it when done)

Neat Trick - Enhancing Skies

OK. Here's a neat trick that I read about in one of my Photoshop books. If you have a washed out sky, you can darken or intensify the sky pretty easily. I did notice that it intensified some of the noise of my original picture, but the effect was minimal and my camera typically has some noise with sky pictures.


  • Add a layer above your picture and fill it with 50% gray
  • Choose a Blend Mode of Color Burn. (To get to Blend Mode right click on your 50% gray layer and choose Blending Options. Blend Mode is one of the top pull down menus.
  • So that the rest of your picture isn't darkened too much, make an Adjustment Layer (the "square with a circle in it" icon at the bottom of your Layers Palette) and using a soft black brush, fill in the areas of your photograph that aren't the sky.
  • Adjust the opacity of the 50% Gray Layer as necessary.


Here are a couple screen prints of the process, followed by a before and after shot of a enhanced sky on a photo.

old_faithful_screen_print_1

old_faithful_screen_print_2

old_faithful_original

This was the original.

old_faithful_enhanced

This was the enhanced version.

old_faithful_noise_filtered

This was the enhanced version with Noiseware Community Edition run on it.

A Few Pictures

I saw my middle girl outside today without any shoes and I had to run outside and try and capture her. This is so my daughter. As soon as she learned to take off her shoes, if the car ride was over five minutes long her shoes would be off. And, while it was a "warmer" day today (in the fifties) those are cold, red feet. She was out there for well over an hour without those shoes on.

feet

My oldest daughter makes the greatest of faces and totally ignores me when I come around with a camera.

face

always_in_thought

And, while not the most engaging picture, this picture means a lot to me, because it shows the shear curli-q-ness of my toddler.

curls

Violinist

violinist

Playing Outside

Here my middle daughter playing outside. She's organizing Heather flowers on an old cutting like it was a Christmas tree.

rachey_playing

Not Much Excitement Here

I have been very short on pictures lately and on anything related to photography and web design. But, as of the last few days, I have been feeling a bit better and so I'm playing with Photoshop and Illustrator. Hopefully, I will get to taking more photos of my darling girls soon, but it is so uninspiring when it rain, rain, rains and your photos are limited to the living room and a flash.

Anyhow, back to my really basic blog entry. I'm going to show you the culmination of my efforts in Photoshop.

custom_brushes

This image includes some of the custom brushes I made. I have real drawing talent, don't I?

custom_brushes_2

This background texture is made using a couple of the brushes I made.

photoshop_fire

photoshop_c

Well, the above images is precisely why my blog entry isn't very exciting. But, I'm experimenting with shapes and textures and custom brushes in Photoshop and Illustrator and hopefully I will learn enough to make something interesting. But, for now, I'll share with you something very simple.

If you make a shape in Photoshop (or import it from another program like Illustrator) and want to make it into a brush, it's very easy. Just choose Edit > Define Brush Preset and give it a name. You can change how the image is spaced and presented when using your brush by then going to your Brushes palette (which is the list looking thing on your Brushed Toolbar.

It is equally easy to save your shape as a shape (assuming it's in the right format for a shape). Just choose Edit > Define Custom Shape.

Here are some tutorials I was working on, but didn't get finished with. I want to go back to them.

Swirl Mania

Create A Spectacular Style Text Effect

The Moon

This was the moon tonight. Not completely full, but according to my husband very close to the Earth right now and it was way huge when it was on the horizon (which, of course, is really the atmosphere bending the light and making it look bigger like a zoom lens).

Now, why will my moon shots turn out, but not my star shots? I mean I know the reason - the moon has enough light to make it f250 at ISO 100. But, who is successful with digital camera star shots and what camera do you have and what is your technique?

the_moon

Braids For The Toddler

My toddler got braids today. I can't believe how long her hair is getting. She definitely has the most hair for her age of my girls. And, despite being a brunette myself, I can't help but fall in love with her curly golden locks, as is the case for most everyone she meets. Natalie got in on the action too and I got a shot of her. ETTL 50mm flash bounced off ceiling, 60 mm macro lens, 2.8/250.

abigail's_braids

abigail's_laugh

nat

A Picture Of My Daughter

I've been under the weather. We're expecting another child come next August and I am in that dreaded first trimester. I have not been doing much, if any, photography, nor playing around with Photoshop. I thought I'd pop in and share a picture I took yesterday, however. I hope you enjoy it. It makes me smile. This daughter is such an either all on or all off kind of girl. This picture really shows my middle daughter's personality.

rachey_walkway

Color Cast

I've been playing around with an old flash I have. I have a ring flash that I purchased a long time ago to take better pictures of products with my old G2. Unfortuneately, even though I owned a fancy flash back then and read the manual several times, flashes were mysterious to me.

I've been reading a lot at Strobist. And, boy, I must say I'm still confused, but the light is starting to glow. I also recently got Scott Kelby's third Digital Photography Book which deals a lot with flashes and deals with off-camera flash (which is what Strobist is all about).

Anyhow, my ring light fits on my macro lens and you can take it off and hold it via it's cord, if you like (you could bungee it to something, but the cord isn't very long). I was playing with it today. The whole idea with flash, as Scott Kelby says so plainly, is to use it in manual mode and balance your flash with the ambient light. There are a couple big problems with that idea though - 1) if your flash is sitting right next to your lens the light is non-dimensional and hard, 2) you have to shoot in manual mode on both your camera and flash to really shoot manually and it can be tricky to get the hang of, and 3) the ambient light (existing light), especially if shot indoors, is usually a different color than the light from the flash.

So, ultimately I'd like to get off-camera. That will involve some purchases. I think I am sold on not going the Canon route for getting off-camera because, although it is my cheapest up front possibility, it is the least flexible. Either buying a second Canon flash and using it as master, or buying the Canon wireless controller, limits your range to a 20-30 degree line of sight. I might want a second Canon flash down the road, anyhow, so that might be a possibility of a next purchase, but I'm not sure. What I've got my heart set on are a pair of Pocket Wizards. These are really fun toys if you don't know what they are. They can remotely trigger your flash or a second camera for that matter. What fun! One day.

So, I was playing around with my macro ring light today and toning down its power and holding it off to the side (my beginning attempts at off-camera flash).

Money set aside at this time may not cover the pocket wizards and accessories at this time, however, what I want to talk about next is that color cast your pictures can get when shot with flash. You can alter your flash light to match the ambient light by putting on either an orange gel (most lighting) or a green gel (flourescent lighting). Gels are cheap and can be velcroed or even taped on.

The following picture is an example. The area, after the fade off from the flash has a real yellow cast. The wall was not yellow. If I am to alter my entire photo, it would be very off-cast. But, I learned a cool little trick in Photoshop recently.

How To Photoshop Out A Color Cast


What I did to this photo and what you can do with most photos (but not all) is Select a Hue/Saturation Adjustment layer and choose the color which is dominating your photo. Then desaturate your color to your liking and increase your lightness. In the case, I desaturated 50% and increased lightness to 100%.

Here is the original:

nat_face_yellow_wall

natalie_face_hue

Here is the desaturated version:

nat_face

Tutorial Reminder

I want to go back and try some of these tutorials. This is just a reminder to myself.

www.tripwiremagazine.com/2009/03/stunning-photoshop-text-effect-tutorials.html

Cow Collage

I made this collage using this tutorial http://www.photoshopessentials.com/photo-effects/collage-warp/. The only thing I would add to the tutorial is that when you make a copy of your warped photo and fill it with black, you'll want to make sure your fill is set to "Preserve Transparency". To do this, instead of using the shortcut, just use Edit > Fill and click the "Preserve Transparency" box. This is so that the fill doesn't fill your entire layer, but just the non-transparent parts.

cow_collage

High Contrast Photo

Over at Graphic Illustrations they call this technique "Lomoization". If you like the technique, you'll want to head over there and follow her video tutorial. In a nutshell we're creating a strong contrast image. Here are some basic steps you take to get this effect. My steps might vary from hers a bit.

1) Select around your main subject using the lasso tool or round eliptical tool.
2) Make sure your feather on the lasso tool is set pretty high (like 50 or more depending on the size of your image).
2) Select the inverse.
3) Use the Levels slider to adjust the background, by taking the grey slider and moving it up. (If you don't like how your selection turned out now is a good time to go back to step one and fix it.)
4) Flatten your image.
5) Apply a curves layer and give it a strong (a little too strong) contrast.
6) Open a new layer and fill it with black.
7) Take the new top layer (black layer) and right-click on it selecting Blending Option. Choose hue in the Blend Mode pull down menu within the Blending Options menu.
8) Lower the opacity of the blended black layer by pulling the opacity slider to the left, until you like the effect on the contrasty-ness of your subject.
9) Open a new levels layer and do a final tweek of your blacks, greys, and whites by pulling the blacks down to make the background darker and adjusting the greys and whites to bring the subject to you liking.

Here are some of my high-contrast images and their originals.

abigail_lomo

This is the image altered with the technique described above.

abigail_before_lomo

This is the "original" image, which was an image I was absolutely thrilled with for it's rich textures and "popping". This image to me looks "lomoized" even before the technique was applied. How I got the result was by accidentally over-exposing, and then pulling down the exposure in Camera Raw. I've got to get out more and experiment with this effect more. Below, you'll see an image that was pretty much "properly exposed".

abigail_proper_exposure

The pretty much "properly" exposed image.

natalie_lomo

Technique Is Applied To The Above Image

natalie_before_lomo

Original

natalie_sunset_lomo_750

Technique Is Applied To The Above Image

natalie_sunset_before_lomo

Original

Photoshop Shapes

One of my main goals in having this blog is to have a place to be able to experiment with Photography Techniques and with Photoshop and Illustrator. With it being a New Year and with everyone talking about their goals for the coming year, I am thinking about how to further myself in my hobbies of being a photographer and a graphic artist. This is just one way I wish to further myself...is just to take a little bit of time here and there and work through Photoshop and Illustrator tutorials. Today I've been over at Graphic Illustrations. I was playing around with a tutorial, how to create pop-art circles. You can use those circles in turn in a collage and create a really nice effect. Check out her site. But, here is the basics of what you do:

1) Open a new document that is square in shape (such as 600 px x 600 px).
2) In your layer's pallete choose gradient and choose radial (make sure your gradient is set to black to transparent).
3) Invert the image
4) Change your file to a grayscale file (so the pixelation we're about to do doesn't end up being in color - you can try it in color for some fun).
5) Go to Filter > Pixelate > Color Halftone
6) Adjust the size of the circle and the angles of the circle to your liking (setting within Color Halftone)

NOTE: You can also make cool effects by creating a gradient of a different shape or by adding other effects to your image such as Filter > Distort > Twirl.

circle_1

circle_3

circle_2

circle_1