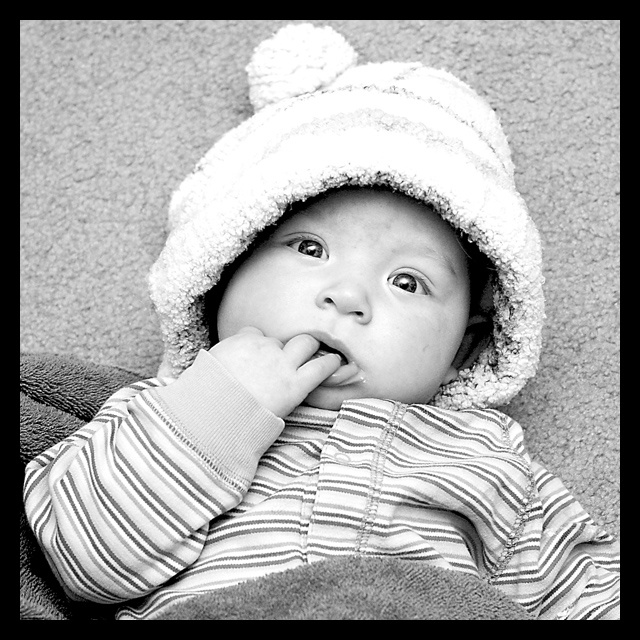
Here is the converted image.
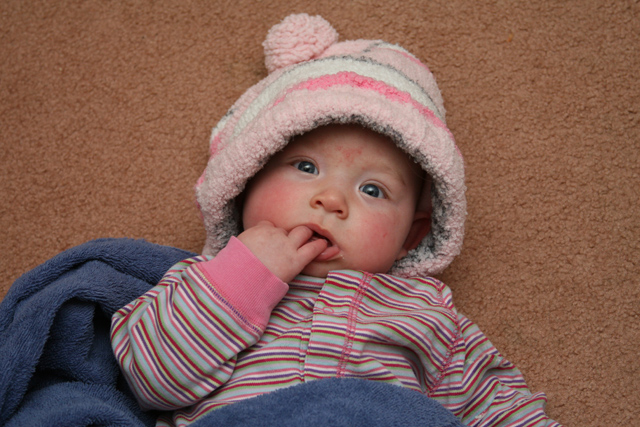
This is the SOCC (straight out of camera) version.
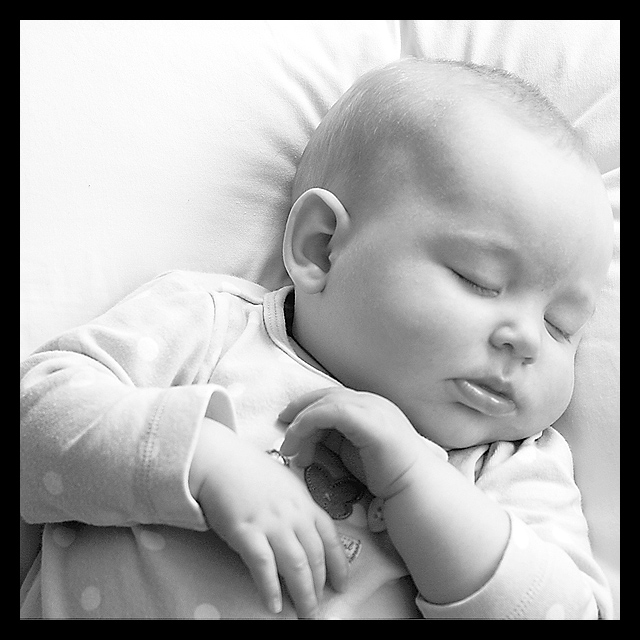
Here is another image converted to black and white with this method.
Here is how to do this type of conversion (I used Photoshop CS3):
- Select Image > Mode > Lab Color
- Click on Channels in the layers pallette
- Select Lightness
- Select Image > Mode > Grayscale
- When Photoshop asks you if you want to discard other layers, click Yes
- Go back to the Channels tab and CTRL-click on your thumbnail image
- Choose Select > Inverse
- Choose Image > Mode > RGB Colors (this allows you to have more options for altering your image)
- Click on the layers tab
- Select New Fill or Adjustment Layer (the half white, half black circle at the bottom of the layers palette), then choose Solid Color. Choose black as your color (#000000). You can alter the opacity of this adjustment layer to suit your liking. You can do this now and/or later.
- Select New Fill or Adjustment Layer, then choose Curves. Make a slight S-curve to your liking (pull the bottom half of the curve slightly to the right, the top half of the curve slightly to the right. This increases the contrast.
You can also alter the opacity of this layer later if you want to your liking. If you move your mouse over the word opacity, it becomes a hand with an arrow and you can slide the opacity of any layer to tweak the effect to your liking. - Select New Fill or Adjustment Layer, then choose Levels. Adjust the levels to your liking.
- Once the image is to your liking, merge the layers.
- Now choose Filter > Sharpen > Unsharp Mask and sharpen in to your liking. My sharpens tend to be in the 150 (amount), 3 (radius), and 5 (threshhold) range, but what you choose for your sharpen totally depends on your picture and your tastes.
3 comments:
These pictures are absolutely stunning! Your black & white conversions are amazing. Keep doing what you are doing!
What a great tutorial! I made a B&W i love using it just ow, lol. I'm following now :)
Hey this is a great tutorial, one quick question though, when you say to create a new curves layer you state to make a standard s-curve and specify by saying move the bottom half right and the top half right. Did you mean move the top half left though? I believe that is how you make a standard s-curve and i'm pretty sure you just made a typo but I could be wrong, please clarify!
Post a Comment